Jeep Xj Rear Disk Brake Conversion: Enhance Stopping Power
Are you a Jeep XJ owner? Do you want better brakes? Converting to rear disk brakes can help. This guide will show you how. It’s simple and easy to follow.
Why Convert to Rear Disk Brakes?
Drum brakes are old. Disk brakes are better. They stop faster. They handle heat better. They are also easier to maintain. For these reasons, many choose disk brakes.
Benefits Of Disk Brakes
- Better stopping power.
- Improved heat management.
- Less maintenance needed.
- More reliable performance.

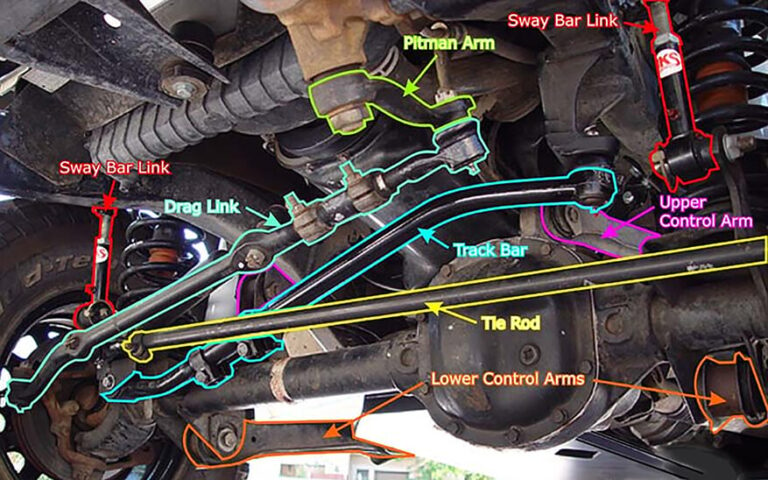
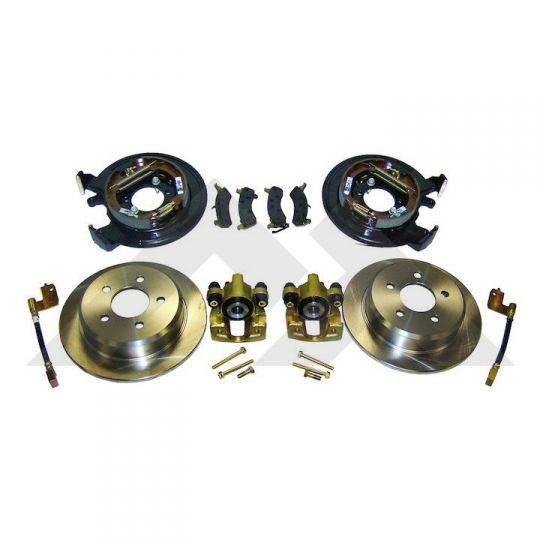
Credit: teraflex.com
What You Need for Conversion
Before you start, gather your tools. You will need a few items. Here is a list of what you need:
| Item | Description |
|---|---|
| Disk Brake Kit | Includes rotors, calipers, and pads. |
| Socket Set | For removing and installing parts. |
| Wrench Set | Helps in loosening bolts. |
| Brake Fluid | For bleeding the brakes. |
| Jack and Stands | To lift the Jeep safely. |
Step-by-Step Conversion Process
Now you are ready. Let’s begin the conversion process. Follow these steps closely.
Step 1: Prepare The Jeep
First, park your Jeep on level ground. Use the jack to lift the rear. Place stands under the axle. This keeps the Jeep stable. Safety first!
Step 2: Remove The Drum Brakes
Take off the rear wheels. You will see the drum brakes. Use the socket set to remove the drums. Be careful with the springs and clips. They can be tricky.
Step 3: Install The Disk Brake Kit
Open the disk brake kit. Fit the rotors onto the axle. Next, attach the calipers. Tighten them with the wrench. Make sure they are secure. Finally, insert the brake pads.
Step 4: Connect The Brake Lines
Remove the old brake lines. Connect the new ones to the calipers. Double-check for any leaks. Tight connections are important.
Step 5: Bleed The Brakes
Now, fill the brake fluid reservoir. Bleed the brakes to remove air. This ensures they work properly. Have a friend help you. One person should pump the brakes. The other should open the bleed valve. Repeat until no air bubbles appear.
Step 6: Test The Brakes
Put the wheels back on. Lower the Jeep from the stands. Drive slowly and test the brakes. Make sure they are responsive. If not, check the connections again.
Tips for a Successful Conversion
Here are some tips to make your conversion easier:
- Read the disk brake kit instructions carefully.
- Have all tools ready before starting.
- Work in a well-lit area.
- Take your time. Rushing can cause mistakes.
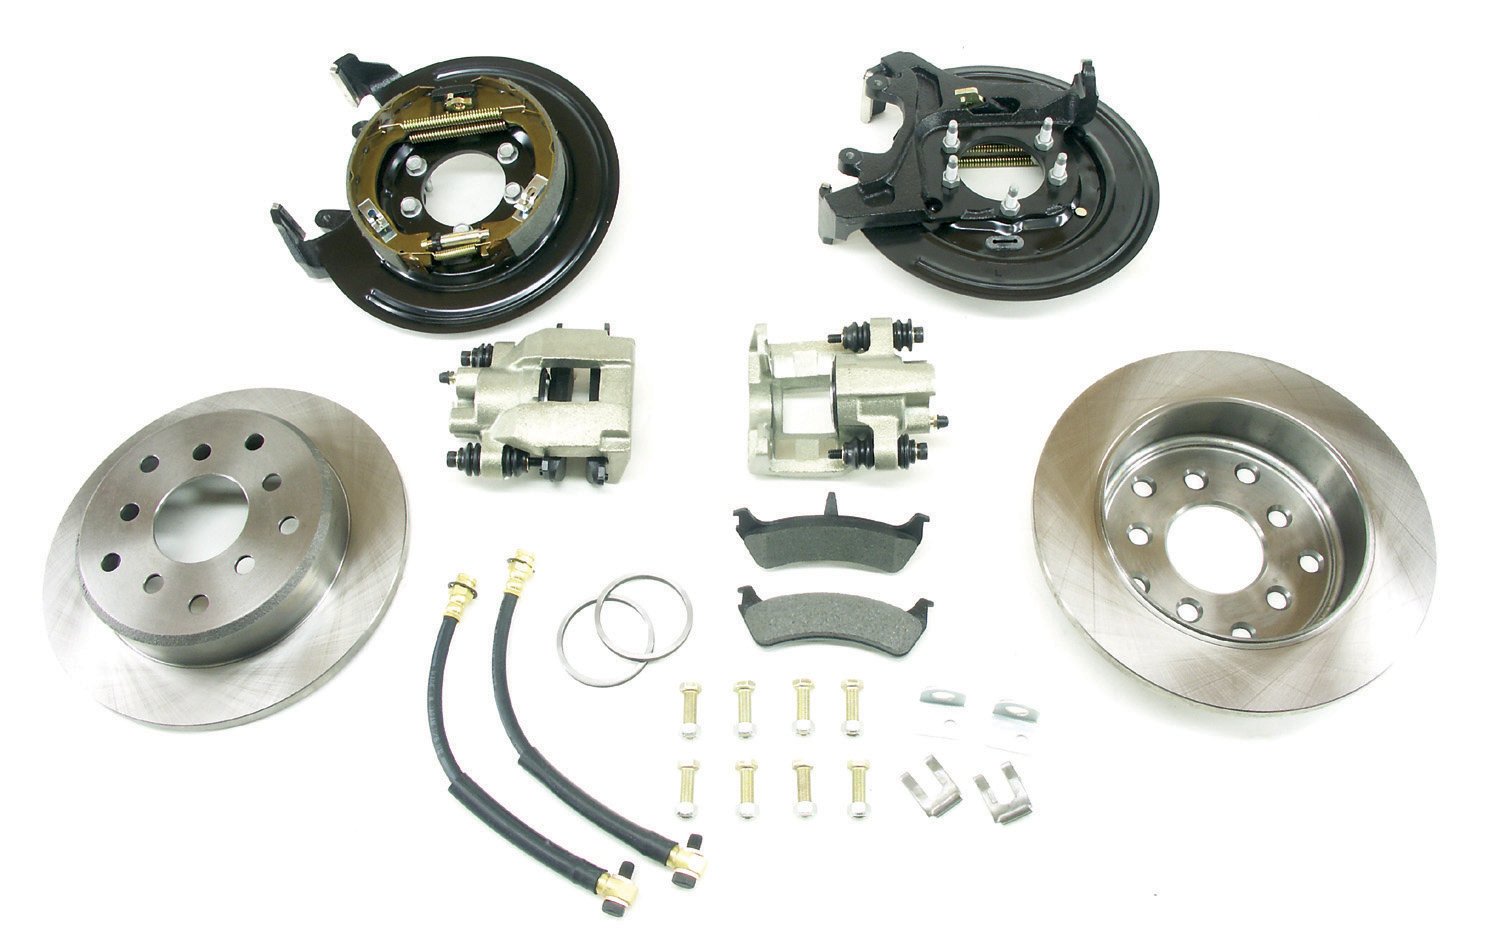
Credit: www.quadratec.com
Common Mistakes to Avoid
Even experts make mistakes. Here are some common ones to avoid:
- Not securing the calipers properly.
- Forgetting to bleed the brakes.
- Using the wrong brake fluid.
- Ignoring leaks in the brake lines.
Frequently Asked Questions
What Are The Benefits Of Rear Disk Brake Conversion On A Jeep Xj?
Improved braking performance and shorter stopping distances. Disk brakes are also more resistant to water and mud.
How Much Does A Jeep Xj Disk Brake Conversion Cost?
Costs vary, typically between $300 to $600. It depends on parts and labor.
Is A Rear Disk Brake Conversion Difficult To Install?
Moderate difficulty. Basic mechanical skills and tools needed. Professional help recommended if unsure.
Do I Need Special Tools For The Conversion?
Yes, basic hand tools, a jack, and possibly a brake line flaring tool.
Conclusion
Converting to rear disk brakes is smart. It improves safety and performance. With this guide, you can do it yourself. Remember to follow each step. Pay attention to details. Soon, your Jeep XJ will have better brakes. Enjoy the ride!