Jeep Cherokee Xj Rear Disc Brake Conversion: Upgrade Guide
The Jeep Cherokee XJ is a popular vehicle. It’s known for its strength and durability. Many owners love taking it off-road. But, some want to improve its braking system. Why? Because better brakes mean safer driving.
Why Convert to Rear Disc Brakes?
Disc brakes are better than drum brakes. They stop the car faster. They also work well in wet conditions. This is important for off-road driving. Here’s why you should consider converting:
- Improved Stopping Power: Disc brakes stop faster than drum brakes.
- Better Cooling: Disc brakes cool down faster. This prevents overheating.
- Less Maintenance: Disc brakes need less cleaning and adjusting.
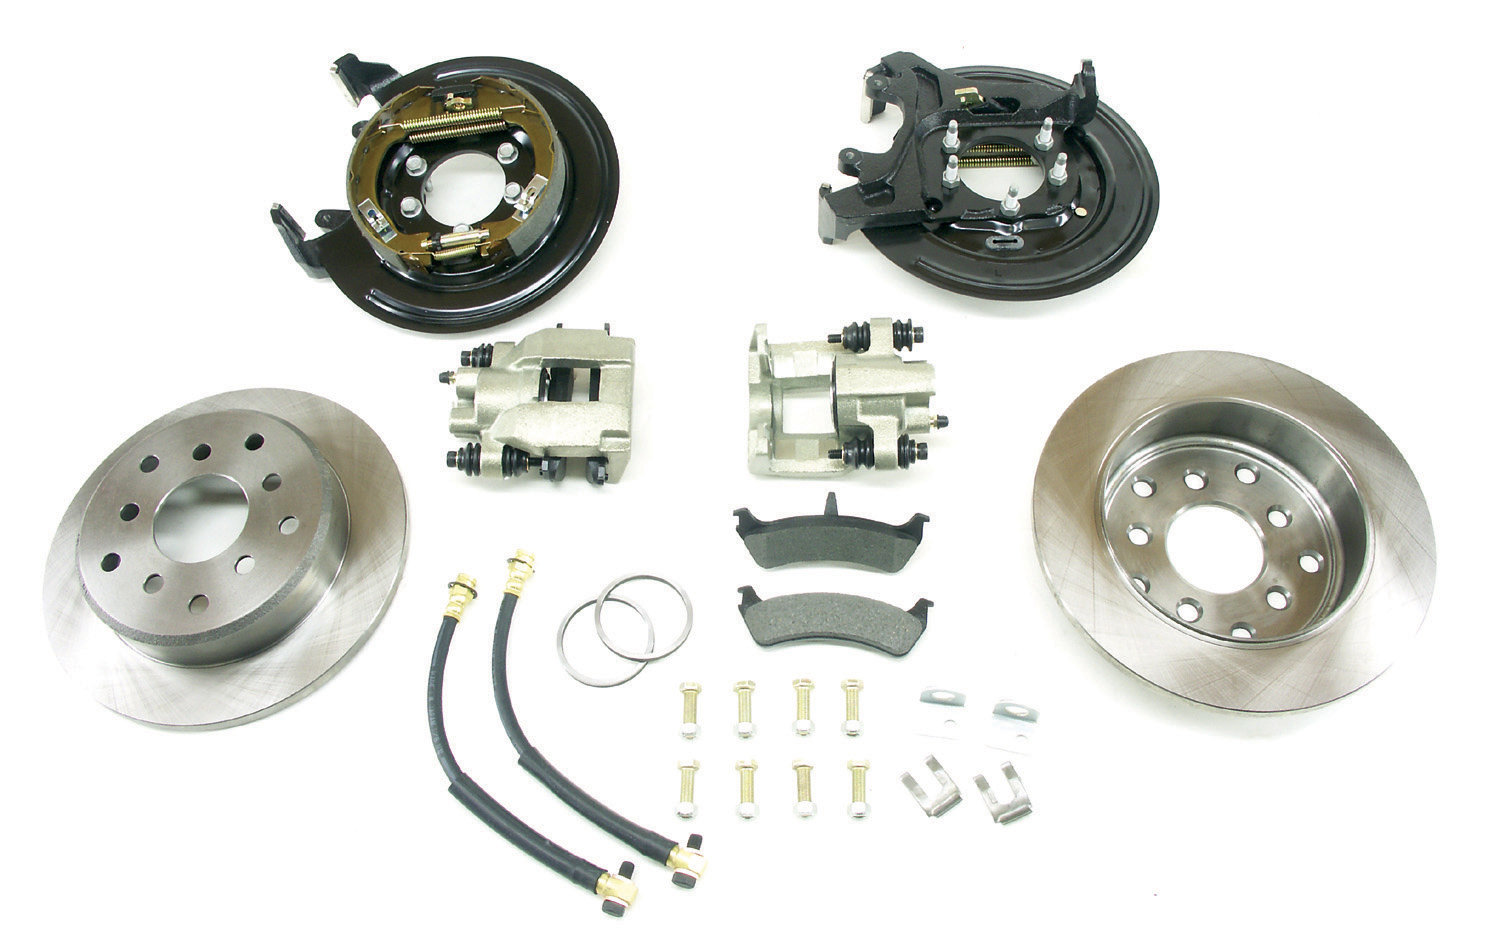
Tools and Parts Needed
You need some tools and parts for this conversion. Here’s a list to help you prepare:
| Tools | Parts |
|---|---|
| Wrench set | Disc brake kit |
| Socket set | Brake pads |
| Jack and stands | Brake rotors |
| Screwdriver | Brake calipers |
| Brake fluid | Brake lines |
Step-by-Step Conversion Guide
Follow these steps for a successful conversion. Take your time. Safety is important.
Step 1: Prepare Your Jeep
Park your Jeep on a flat surface. Use the parking brake. Lift the rear end with a jack. Secure it with stands. Remove the rear wheels.
Step 2: Remove Drum Brakes
First, take off the drum cover. Use a screwdriver if needed. Next, remove the brake shoes. Take out the springs and adjuster. Keep these parts safe.
Step 3: Install The Disc Brake Kit
Start by attaching the brake caliper bracket. Use bolts to secure it. Place the rotor on the wheel hub. Slide the caliper over the rotor. Tighten the caliper bolts.
Step 4: Connect Brake Lines
Attach the new brake lines. Connect them to the caliper. Make sure they are tight. Check for leaks. If none, proceed to the next step.
Step 5: Add Brake Pads
Insert the brake pads into the caliper. They should fit snugly. Make sure they are aligned. This ensures proper braking.
Step 6: Bleed The Brake System
Bleeding removes air from the brake lines. Open the bleeder valve. Press the brake pedal. Close the valve. Repeat until no air comes out.
Step 7: Test Your New Brakes
Lower your Jeep. Test the brakes in a safe area. Make sure they work well. If they do, your conversion is complete.

Credit: teraflex.com
Benefits of Rear Disc Brakes
Converting to disc brakes offers many benefits. Here are a few more:
- Smoother Braking: Disc brakes provide smoother stops.
- Less Noise: They make less noise than drum brakes.
- Longer Lifespan: Disc brakes last longer.
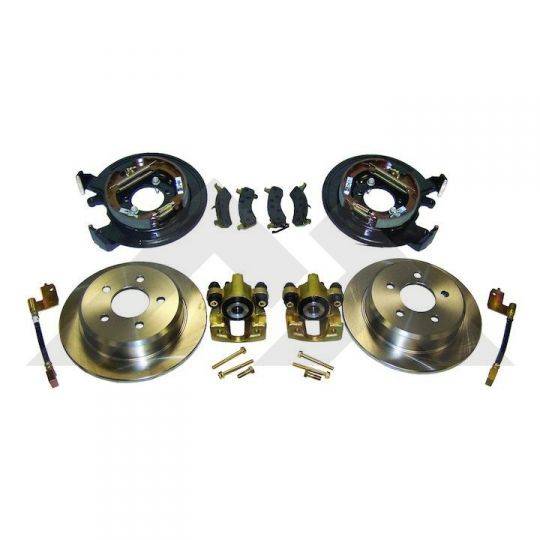
Credit: dpgoffroad.com
Considerations Before Conversion
Think about a few things before you start. This will help you make a good decision.
- Cost: Disc brake kits can be expensive. Check your budget first.
- Time: The conversion takes time. Plan for a full day.
- Skill Level: You need basic mechanical skills. If unsure, ask a professional for help.
Frequently Asked Questions
Why Convert Jeep Cherokee Xj To Rear Disc Brakes?
Disc brakes offer better stopping power. They require less maintenance compared to drum brakes.
How Does A Rear Disc Brake Conversion Improve Performance?
It enhances braking efficiency. Provides better heat dissipation. Reduces stopping distance.
What Parts Are Needed For The Conversion?
You’ll need rotors, calipers, brake pads, and brackets. Sometimes, a new master cylinder.
Is Rear Disc Brake Conversion Cost-effective?
Yes, long-term savings on maintenance. Improved safety is worth the initial investment.
Conclusion
Converting your Jeep Cherokee XJ to rear disc brakes is a good choice. It improves safety and performance. Follow the steps carefully. Enjoy your smoother and safer drive!