How to Recharge AC System After Compressor Replacement: Step-by-Step Guide
Your car’s AC system is a lifesaver on hot days. But after replacing the compressor, you might wonder what to do next to get your cool air flowing again.
If you don’t recharge your AC system properly, it won’t work as it should—and that means no relief from the heat. In this guide, you’ll learn exactly how to recharge your AC system after a compressor replacement, step by step.
By the end, you’ll have the confidence to restore your car’s cooling power and enjoy a comfortable drive once more. Keep reading to find out how to make your AC system work like new again.
Credit: investburkina.bf
Preparing The Ac System For Recharge
Preparing the AC system for recharge is a crucial step after replacing the compressor. It ensures the system works efficiently and safely. Proper preparation helps avoid future problems and extends the life of the AC unit.
This stage involves careful checks and gathering the right tools. Taking the time to prepare makes the recharge process smoother and more effective.
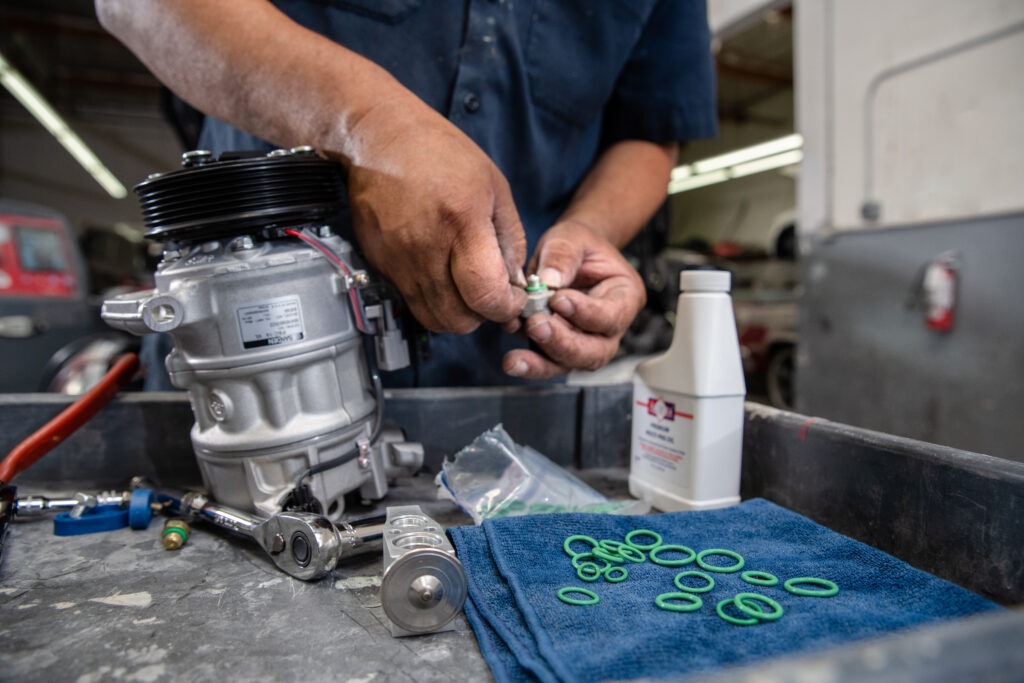
Inspecting The Compressor Installation
Start by inspecting the new compressor installation. Check that the compressor is securely mounted. Look for any loose bolts or connections. Make sure the electrical wiring is properly connected. Confirm the compressor matches the system specifications. A correct installation is key to proper AC function.
Checking For Leaks And Damages
Next, check the entire AC system for leaks or damage. Use a leak detector or soapy water on joints and hoses. Look for bubbles that show escaping refrigerant. Inspect hoses and fittings for cracks or wear. Fix any leaks before recharging the system. Damages can cause refrigerant loss and poor cooling.
Gathering Required Tools And Materials
Collect all tools and materials needed for recharge. Common items include refrigerant, gauges, a vacuum pump, and safety gear. Ensure the refrigerant type matches the system requirements. Having everything ready saves time and avoids interruptions. Proper tools help perform the recharge safely and accurately.
Credit: www.autozone.com
Evacuating Air And Moisture
Evacuating air and moisture from the AC system is a crucial step after replacing the compressor. Air and moisture inside the system can cause poor cooling and damage parts. Removing these elements ensures the system works properly and lasts longer. This process uses a vacuum pump to pull out trapped air and water vapor. Follow these steps carefully for best results.
Connecting The Vacuum Pump
Start by connecting the vacuum pump to the service ports on the AC system. Attach hoses firmly to avoid leaks. Use the low-pressure and high-pressure ports for a complete evacuation. Make sure all valves on the manifold gauge set are closed before connecting. This setup allows the pump to remove air and moisture efficiently.
Running The Evacuation Process
Turn on the vacuum pump and let it run for at least 30 minutes. This time frame is needed to pull out all air and moisture. Watch the gauge to ensure the pressure drops steadily. A slow or no drop indicates a leak or blockage. Keep the system sealed during the process. Avoid opening any valves until the evacuation is complete.
Verifying System Vacuum Levels
After evacuation, close the pump valve and turn off the vacuum pump. Check the vacuum gauge for a steady reading below 500 microns. A stable vacuum means no air or moisture remains. If the pressure rises, there may be a leak. Repeat the evacuation if needed. Only proceed to recharge the system once the vacuum level is confirmed.
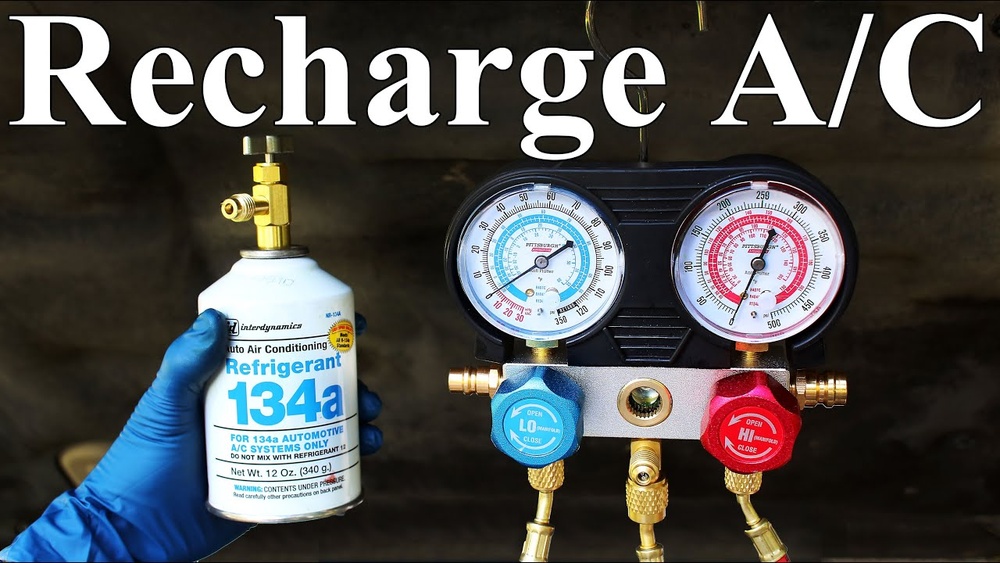
Adding Refrigerant To The Ac System
Adding refrigerant to the AC system is a key step after replacing the compressor. The right amount of refrigerant helps the system cool your home efficiently. Too little or too much refrigerant can cause problems. Proper charging ensures the AC works well and lasts longer.
Selecting The Correct Refrigerant Type
Choose the refrigerant type specified for your AC system. This information is usually on the unit’s label or in the manual. Using the wrong refrigerant can damage the compressor and other parts. Common types include R-22 and R-410A. Make sure to use the exact type to keep the system safe and effective.
Measuring The Proper Refrigerant Amount
Check the manufacturer’s guide for the correct refrigerant amount. The system needs a precise charge for optimal performance. Use a scale to measure refrigerant cans before adding. Avoid guessing or overcharging, which can lead to leaks or poor cooling. Measure carefully to protect your AC system.
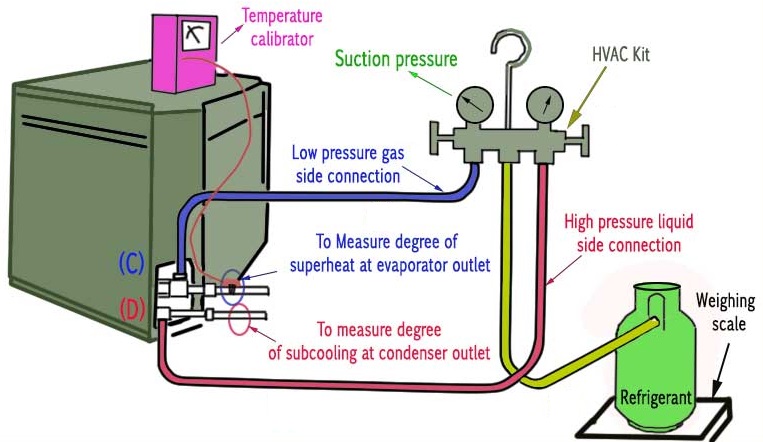
Using Manifold Gauges For Accurate Charging
Manifold gauges help monitor pressure during charging. Connect the gauges to the high and low sides of the AC system. Read the pressure values to control refrigerant flow. Proper pressure ensures the right refrigerant amount inside. Use the gauges to avoid over or undercharging the system.
Testing And Final Adjustments
After replacing the AC compressor and recharging the system, testing and making final adjustments are key steps. These steps ensure the system runs smoothly and cools effectively. They help catch any problems before using the AC regularly.
Proper testing also protects the system from damage. It confirms the recharge process worked and the system pressure is balanced. Carefully monitoring these factors leads to better AC performance and longer equipment life.
Monitoring System Pressures And Temperatures
Start by checking the system’s pressure levels with gauges. Compare high and low side pressures to manufacturer specs. Normal pressure means the refrigerant amount is correct. Abnormal readings suggest leaks or blockages.
Also, measure temperatures at key points like the condenser and evaporator. The temperature difference between these parts shows how well the system cools. Record these numbers to track system health over time.
Checking For Proper Cooling Performance
Test the AC’s cooling by feeling the air at the vents. The air should be cold and steady. Use a thermometer to check the vent temperature. It should drop below room temperature by 15 to 20 degrees Fahrenheit.
Listen for unusual noises from the compressor or fans. Smooth, quiet operation means the system is working well. Any strange sounds need further inspection.
Addressing Potential Issues After Recharge
Look for signs of leaks around fittings and hoses. Oil stains or refrigerant smells indicate leaks. Tighten connections or replace damaged parts as needed.
If pressures or temperatures are off, recheck refrigerant levels. Overcharging can cause high pressure. Low refrigerant means a leak or incomplete recharge.
Fix any problems before using the AC extensively. Proper adjustment ensures efficient cooling and avoids costly repairs.

Credit: www.youtube.com
Frequently Asked Questions
How Do I Recharge An Ac System After Compressor Replacement?
First, evacuate the system to remove air and moisture. Then, add the correct refrigerant amount specified for your AC.
What Tools Are Needed For Ac System Recharge?
You need a vacuum pump, refrigerant gauges, and the right refrigerant type. These tools help ensure a proper and safe recharge.
How Much Refrigerant Is Required After Replacing The Compressor?
The amount varies by vehicle model and compressor type. Check your vehicle manual or label for the exact refrigerant quantity.
Can I Recharge The Ac System Without Professional Help?
Yes, but it requires proper tools and knowledge. Mistakes can damage the system or reduce cooling performance.
Conclusion
Recharging your AC system after replacing the compressor is important. Follow each step carefully to avoid mistakes. Use the right tools and refrigerant for safety. Check for leaks before turning the system on. Proper recharging keeps your AC cool and efficient.
Regular maintenance helps your system last longer. Take your time and double-check your work. This keeps your car comfortable during hot days.